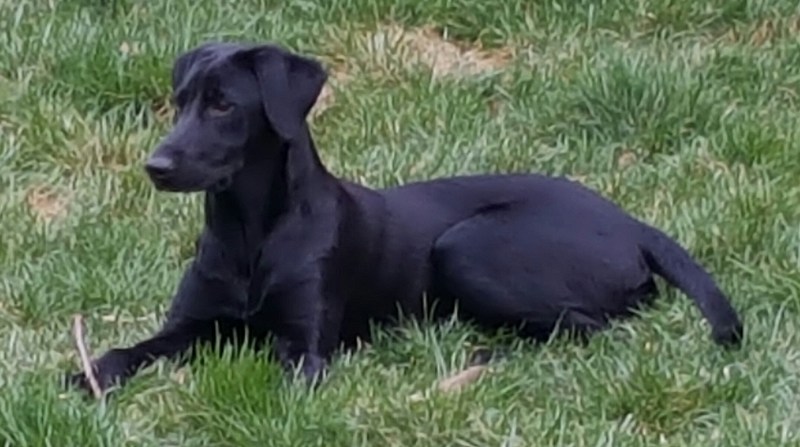
Today, on our first day of Stage 2 training, I began teaching Lightning the formal pattern for heeling to the start line. Here’s how we went about it.
For equipment, you need:
- High-value treats (I use sliced deli meat)
- A holding blind
- A rubber mat
- Possibly a mallet to drive the holding blind’s posts into the ground
- Your dog will wear both his/her training tab and a lead for walking. I use a British slip lead because it easily fits in my pocket while I’m running the dog
- One bumper
- You don’t need an assistant, but when you have one, he/she can play a judge
Now, using the treats for ample reinforcement, train the pattern you will use for heeling the dog to the start line. Trainers use a number of variations, but here’s the pattern I use, and I believe many others do as well:
- Start with an empty dog by airing your dog as long as necessary. Don’t waste a training or competition opportunity by trying to run a dog distracted by nature’s call, resulting in a subpar performance.
- Begin the sequence by walking the dog on lead to the center of the holding blind.
- The dog may spend several minutes in the blind, so use soothing words, petting, and so forth to make the wait comfortable. If it helps during training, you can also use treats for this process.
- In competition or a training day, use this waiting opportunity to watch the team in front of you and learn what you can from their work.
- At the same time, watch closely for any loose dogs that approach the holding blind. Protect your dog, and above all prevent a dog fight. If necessary, drop to your knees and wrap your arms around your dog. If the other dog gets too close, warn that dog in no uncertain terms, “GET OUT OF HERE!” If that embarrasses the dog’s owner, fine. More likely, he/she will be grateful for your diligence in preventing a fight that could lead to both dogs being eliminated from the event or even banned from the sport.
- When the judge invites you to run your dog, ask any questions you might still have.
- Now it’s time to bring out your dog. Cue “Sit”. Most people use a verbal cue, but some use a whistle.
- Remove the dog’s lead. In training, the dog is still wearing his/her tab until reliably steady.
- Leaving the dog in a sit, step outside the holding blind. Practice both sides. If you have a choice, choose the side that will give the dog the best view of the setup as he/she approaches the start line.
- While watching your dog waiting in the holding blind, stop a few feet away, turn your body toward the start line, and call your dog to heel. Again, practice both sides. Having the dog sit at heel is optional, but at this moment, you and the dog are now under judgment, so train this maneuver to be performed with some precision. I gave Lightning a piece of ham here. Practice until you can call the dog to heel from the holding blind and to your side with the two of you fully engaged with one another.
- Heel the dog to the start line, that is, the rubber mat a few feet in front of the holding blind. Sometimes it is quite close to the holding blind, but usually it’s several feet away. Again, you are under judgment and the dog needs to learn this maneuver with precision. I used ham for this step, too. Practice initially away from all distractions, then, over time, proof with the greatest distractions you can arrange. Reinforce correct behavior amply, but if the dog breaks away when training this maneuver, gently put on the dog’s lead, return to the holding blind, and start again. Practice heeling the dog to attain fluency on either side.
- Heel the dog onto the mat and cue Sit. Typically the dog only needs to have one foot on the mat, but if you’re not sure, that’s one of the questions you would have asked the judge. In training, reinforce a correct response, but start over if the dog doesn’t sit down immediately.
- In theory, you’ve now finished practicing the skill we’re working on right now, but the dog would probably appreciate it if you’d throw the bumper for him/her to retrieve. Hold the dog’s tab if necessary to prevent a break, then send the dog on his/her name. Cue the dog to heel, again practicing both sides, and take the bumper. We’re beginning this training before we’ve taught a delivery to hand, so it’s OK if the dog drops the bumper rather than holding it for you take at this stage. On the other hand, if the dog doesn’t let go of the bumper either when you take it or when you cue Out (or whatever cue you use), just wait until the dog becomes bored and releases the bumper.
- You are still under judgment, so don’t take your lead out of your pocket yet.
- Don’t turn away from the dog. The dog will sometimes break at that moment. Instead, position yourself to block a break and cue Heel.
- After heeling a few feet, and before walking past the holding blind where the next dog is waiting, stop and put on your dog’s lead. Many trainers trust their dogs and therefore don’t follow this step. When he was younger, Laddie was attacked twice in the holding blind by such dogs. It did not improve his attitude toward other dogs.
- In competition or with a training group, you’d now typically walk the dog on lead to your vehicle. When training this skill without other dogs in line, you can return to the holding blind and repeat the sequence to continue practicing it.
Based on Lightning’s training in Stage 1, he was able to perform this sequence on both sides in a non-distracting setting the first time we tried it. Other dogs may need more or less detailed training before being able to perform all the steps in sequence, but all dogs will need extensive distraction proofing.
When you and the dog are ready, merge this sequence into all your retrieve practice so that the novelty and difficulty is gone by the time the dog is running in an event. That way, you can both focus on the test instead of the mechanics of getting to the start line.
Update: I was a bit too impatient to begin Lightning’s Stage 2 training when I started today with heeling to the start line. I believe the material I covered here is still worthwhile, and Lightning did fine with it, but I now feel that my sequence was less than ideal. PRT Stage 2 should begin with the training Mike demonstrates in TRT disc 1, as introduced in the next post, and that’s how I’ll proceed with Lightning from here on.
