Distraction proofing

I’m now going to tell you about one of the most magical dog training methods in the world. It’s magical because it doesn’t seem possible that it would work so well, but if you try it, you’ll see that it does.

Let’s say the dog has a favorite article that she is just crazy about. You have no problem with her enjoying it, but she ignores you when you try to you call her away from it. The article might be an inanimate object, such as a bumper, or a bird from the freezer. It might be food. It might be children. It might be other dogs or other animals. It might be several of these things or other things if I’ve somehow left anything out. For Lightning, it’s all of the items I mentioned except food.

I need to fix all of them for Lightning eventually. That’s the whole point of recall. But let’s start with the bumper, since I have an immediate need to fix that now that Lightning and I have begun working on the Walking Fetch drill (see next post). 

There are two versions of this method. First, the version I was taught years ago:

  1. Place the article on the ground in an area free of distractions.
  2. Take the dog off-lead to a position some distance away, where the dog can easily see the article but because of the distance from the article is focusing on you instead. That could be 100’away or 20′, or any other distance, depending on the dog and the article.
  3. Stand sideways to the article and toss a high-value treat a few feet in front of you.
  4. Watch the dog run to get the treat and then use your recall cue to call the dog back to you. For an American field retriever, the recall cue is Here.
  5. If the dog glanced at the article either running to the treat or coming back to you, you’re too close. This is the “no-glance” rule and is the key to the magic. If the dog did glance, take a side-step away from the article.
  6. If the dog did not glance at the article, take a side-step toward the article.
  7. Continue in that way over and over, gradually moving closer to the article, until you can toss the treat over the article. My Lumi-girl was fanatical about her volleyball when she was a young dog. When I used this method to proof her, she actually tripped on the volleyball, so intent was she not to glance at it as she ran to her treat and then ran back to me. I couldn’t believe it.
  8. Although we usually train in short sessions, take as long as you need to complete the training for one article, assuming the dog stays engaged. If you need to start pretty far away, it can take a while to get all the way to the article.
  9. Over time, proof for other directions at the same location, and other locations, retraining as needed. 

Here’s an alternate version:

  1. It’s the same as the first version, except that instead of tossing the treat, you heel the dog back and forth with the article to your side. As you walk one direction, the dog is on your left and the article is some distance away on your left. As you walk the opposite direction, the dog and article are now on your right.
  2. The sequence is: Cue Here, then walk a few paces, then turn 180 degrees facing the dog as you turn. The dog wiil naturally turn toward you at the same time, that doesn’t need to be trained. When you’re facing the way you came, cue Heel if necessary to bring the dog to heel position, then cue Sit. Give the dog a taste of a high-value treat. You can use the same kind of treats as for the first version, but you can also use non-throwable treats like a taste of PB, cream cheese, or cat food. 
  3. As before, walk closer the next time if the dog did not glance at the article, but follow the no-glance rule and move further away if the dog did glance at the article.

The advantage of the second version for field retrievers is that you get to practice, and build reinforcement history, for heeling on both sides as well as the formal obedience cues Heel, Here, and Sit.

But in terms of distraction proofing, both versions are wonderfully, indeed magically, effective.

Lightning at seven months

Today Lightning turned 7mo. For our training, I took him and Laddie to our closest training property, about a three hour round trip. I had hoped to train with some others, but we ended up working alone.

As I’ve described in previous posts, Lightning is now in PRT Stage 2, corresponding to Mike Lardy’s TRT Basics, which means we’re working on yard work and field work in parallel. At the training property, he and I did some of both.

We began with some location-proofing for the Fetch Game that Lightning has been learning in yard work the last couple of days. We had trained it indoors and had also practiced it in our yard, and now we were able to practice it in a field training location with the associated environmental distractions, but at this stage without the distractions of a training group nearby. Lightning has developed a reflexive, instant, lunging response to the Fetch cue, picking a bumper up off the ground and delivering it to me. He showed it in today’s training at the new location when he was right in front of me as well as when he was some distance away. 

After the yard work, we drove around and settled on two locations for field work. At each location, I ran Laddie on some blinds with diversions and keyholes, and then created a setup suitable for Lightning’s current field work objectives for the circumstance where we’re training alone. It’s been too cold lately for swimming, so we were only able to work on land.

My two field setups for Lightning were mirror images of one another. In each case I set up two stickmen, one at around 20y, the other at around 35y. I used a mat for our start line. I would have liked to use a holding blind behind the mat, but the combination of a stiff wind and rock-hard ground made that impractical.

At both locations, I ran Lightning on an angle away from the wind. Judges don’t usually set up marks for the dog to run into the wind because they’d be able to follow the scent to the bird.

I used 3″ white bumpers with streamers, and pistol shots, for all marks. These were poorman marks. For the single marks, I left Lightning in a sit at the start line, walked out, fired the pistol, walked back to him, and sent him on his name. For the doubles, I left him at the start line, walked to the first station, threw the first mark, walked to the second station, threw the second mark, walked back, sent him to the go-bird (the second mark I’d thrown), and when he delivered that, sent him to the memory bird (the first mark I’d thrown).

For the first setup, I ran Lightning on four poorman singles and one poorman double, as follows:

  1. Single to short station, thrown outside the angle made by the two stickmen.
  2. Single to long station, thrown in the opposite direction, so again outside the angle.
  3. Repeat of #1.
  4. Repeat of #2.
  5. Double made up of the same two marks, the long one thrown first and retrieved last.

For the second setup, I ran Lightning on two singles, a double, and a final single, again all poorman marks, as follows:

  1. Single to short station, thrown outside the angle made by the two stickmen.
  2. Single to long station, thrown in the same direction, so this time inside the angle. 
  3. Double made up of the same two marks, the long one thrown first and retrieved last.
  4. 60y single, the only mark of the day not thrown from a stickman but instead thrown from a position in the angle between them, and on an angle back to a fall also in that angle. The bumper was visible in flight but past the crest of a rolling hill on the ground, so Lightning couldn’t see it till he was close to it.

Lightning ran straight to every mark, including the memory birds for the doubles. Not all of his returns were great, but they got increasingly better. For both marks of the last double and for the long final single, he picked up the bumper, came straight back to me, and held the bumper till I took it. I’m not ready to require delivery to hand yet, much less bringing him to heel to deliver, but he even did that for delivering the first mark of the double, positioning himself facing the field and ready to launch toward the memory bird when sent.

Though I didn’t have an assistant to act as gunner today, I felt Lightning was nonetheless making progress on our two current field work objectives with today’s session: running singles with multiple guns out, and lead steadiness. He was dealing with stickmen rather than human gunners, but hopefully it was similar. And he wasn’t practicing lead steadiness because he had to be steady while sitting by himself at the start line, but hopefully his steadiness training was still benefiting.

So that’s where Lightning is at this stage in his training.

Some photos of Lightning and Laddie

I thought it might be interesting to post some photos I took in the bedroom this afternoon to show how small Lightning still is.

At just shy of 7mo, Lightning is just over 40lbs. For contrast, I’m showing him next to Laddie, my 8yo 68lb field Golden. Ryley, DW Renée’s 9mo confirmation-bred Golden, not shown, is up to 72lbs at last weighing and hasn’t grown into his paws yet. I don’t think Lightning is ever going to catch up to Ryley in size.

I think Laddie and Lightning are both gorgeous dogs in beautiful condition. Sorry my attempt at photography doesn’t show it.


Formal Fetch step 2: the Fetch Game

Well, my estimate for how long it would take Lightning to learn the Hold behavior chain I described in my previous post was far too pessimistic. For the indoor training, it actually took six short sessions, five yesterday and one this morning. For this last session, I broke a piece of Muenster into eight pieces but we only needed six trials, alternating left and right heel and in various indoor locations, to establish that that chain is now solid indoors. I don’t think it will take long to proof outdoors.

But that probably won’t happen today. After temps in the low 80s at times last week, this morning we had wind chills in the teens with winds gusting to 45mph.

In the meantime, we’ll start the next step of our yard work. In the TRT program’s section on Force Fetch, Mike Lardy calls this step “Ear Pinch”. In our PRT program’s section on Formal Fetch, we’ll call it “the Fetch Game”.

After again reviewing Mike’s video presentation on Ear Pinch, giving a sense of our performance objective, we’ll again depart entirely from the training method we’ll use to achieve it.

The behavior sequence for the Fetch Game in PRT is as follows:

  1. Leave the dog in a sit with the bumper somewhere near him/her. Don’t let the dog pick up the bumper yet. 
  2. Walk a short distance from the dog and turn to face him/her.
  3. Cue Fetch. While you remain still, the dog is to grab the bumper and start running toward you.
  4. Run away shouting and laughing, darting left and right, possibly hiding behind trees or other objects.
  5. When the dog catches you, bring him/her to a sit in heel position, grasp the bumper, and cue Drop.
  6. Put the bumper down again somewhere in the dog’s vicinity, and walk away again for the next trial. For the hardest version, put the bumper behind the dog.

The theory behind the Fetch Game is that for Lightning, and I think for most retrievers and other predators as well, one of the best parts of a retrieve is the chase. The trouble with the normal retrieve pattern is that the chase comes first, making the return and delivery something less to look forward to, that is, less reinforcing.

The Fetch Game reverses that pattern. Instead of a chase to the prey, the chase comes after the pick up, providing one of the strongest intrinsic reinforcers in the dog’s psyche. That’s why it’s important not to start running away with all that excitement until the dog has grabbed the bumper. The grab itself is the behavior we want to reinforce.

Although our behavior chain is different from Mike’s, we’ll follow the same model he does of shaping the behavior incrementally. For example, we’ll place the bumper between the dog and us at first, and we won’t require the full delivery sequence at first. If the dog doesn’t run to us as soon as we say Fetch, we’ll say Here a moment later until that’s no longer needed. If the dog doesn’t pick up the bumper on the way, we’ll do a mini-retrieve at first, tossing the bumper a short distance, cueing Fetch, waiting a moment while the dog runs to the bumper, and running away excitedly at the instant the dog grabs the bumper. After two or three trials, we’ll experiment with fading out the toss and just placing the bumper on the ground until the dog has the idea. If the dog simply doesn’t seem to understand that Fetch means to grab the bumper, we’ll start with a session or more of incrementally shaping that behavior, much as Mike does in the video but using treats for reinforcement rather than ear pinches. Then we can build the really high reinforcement history for Fetch using the Fetch Game.

I’ll leave it to your imagination to come up with your own solutions to building the Fetch Game behavior chain incrementally, so that you can get to the point of being able to play the final version. If you’re lucky, the dog will respond correctly from the first trial, as Lightning did.

You could start this game indoors, as I did because of the unpleasant weather, or in the yard from the beginning. Unlike the comparatively difficult to train Hold cue, your dog, like Lightning, may pretty much understand Fetch immediately given his/her months of previous work in the PRT program.

Once learned, proof the Fetch Game for a wide variety of locations and distractions. For example, a cool version would be to place a thawed bird in some shallow water, cue Fetch, and have the dog grab the bird, chase you, and deliver the bird after getting to you thru some reeds or swampy terrain. 

Even after Lightning is fluent with the Fetch Game, I plan to continue practicing it occasionally for some time. I believe that the more I practice reinforcing him with a chase after he has picked up the article on the Fetch cue, the greater will be his reinforcement history for grabbing the article on cue and delivering it. But I’ll be sure also to practice a Fetch, Heel, and delivery right near me, since that’s a common situation. Then, his Fetch response will be available that day when he drops a bird on the return during a competition and I need him to pick it up and complete the delivery to avoid disqualification. The judges won’t be thrilled with the dropped bird, but hopefully they’ll be pleased with Lightning’s well-trained Fetch response.

Formal Fetch step 1: Hold

Referring to the TRT Flow Chart’s “Basics” section and the right column called “Field Work”, I think Lightning is a bit ahead of the game on lead steady. But I want to continue working with him on singles with guns out till his returns with multiple guns out (or stickmen out) are satisfactory.

Meanwhile, I’m satisfied with his performance on formal obedience for the “Yard Work” column, especially because we’ve now integrated those skills into every retrieve in the field, so we’ll continue to work on them continuously anyway.

Therefore, we’ll stay with the first two items for field work, but we’ll go onto the next item for yard work. In TRT Basics it’s called “Force Fetch”, but in PRT Stage 2 we’ll call it “Formal Fetch”. I’ve also heard it called “Trained Retrieve”. Whatever the name, it consists of training three cues: Fetch, Hold, and Drop. (I’ve always used “Out” but we’ll switch to “Drop” for consistency with TRT.)

You can learn a positive approach to training a formal retrieve from several online websites and videos. Generally they use an approach called back-chaining, which trains the cues in the reverse order they’ll occur. So first you train Drop, and then Hold, and finally Fetch. As the dog learns Hold and Fetch, he/she already knows what comes next, so the whole chain accumulates reinforcement history.

For PRT, however, we’ve already trained a version of Fetch we called “Take it” and a version of Drop we called “Out”. Lightning has been pretty fluent with both for a couple of months. So other than the names, only Hold is new to us at this point.

Coincidentally, Hold is where Mike begins training Force Fetch. That’s what we’ll work on now for Formal Fetch as well.

But at this point, I’ll depart entirely from Mike’s approach. Rather than copying Mike’s style of teaching Hold, let’s define a specific behavior chain and then shape it, that is, incrementally improve and reinforce each version of each step until the dog can perform the entire chain fluently.

Our definition for Hold will be that the dog be able to:

  1. Stay in a remote sit holding a 2″ bumper while we walk some distance away.
  2. On verbal Here or whistle Come-in, come to front position and, with a verbal or whistle Sit cue if needed, sit in front position while still holding the bumper.
  3. On Heel and a hand gesture, stand up, swing to heel position on either side, and, with a verbal or whistle Sit if needed, sit while still holding the bumper.
  4. Continue to hold the bumper even if we place our hand near or on the dog’s head or chest, or touch the bumper’s rope, or tap the bumper in any direction, without saying Drop.
  5. When we finally grasp the bumper and say Drop, the dog should instantly open his/her mouth and pull his/her mouth away from the bumper.

Because of Lightning’s earlier training as described in previous posts, and no doubt thanks to his instincts as well, sometimes, in a non-distracting room of the house, he is already able to do an approximation of that entire behavior chain. He even seems to find it self-reinforcing, so on those occasions I don’t seem to need any extrinsic reinforcement such as treats, tug, or a thrown ball.

But other times, we need a traditional shaping session. The first one, for example, looked like this:

  1. I tried sliced hot dogs but Lightning wasn’t interested enough. So I switched to a small bowl of cream cheese, which I dipped my finger in to give him a taste when I wanted to reinforce a correct response.
  2. I tried working from a standing position but leaning over was too hard on my back so I switched to sitting down on the lower steps of our stairs.
  3. We did about thirty trials in rapid succession.
  4. For most trials I started with a verbal Sit cue, since Lightning generally popped up after each trial. Sometimes I just let him keep standing.
  5. I presented the horizontal bumper in front of his mouth. Most of the time he just grabbed it. Occasionally he didn’t and I said “Take it,” and then he’d grab it.
  6. This next point might have been the most difficult for an observer to see, but it was also the most critical. Lightning would let go of the bumper after a split second. I needed to use the cream cheese to reinforce the Hold moment, not the let-go moment. Yet I also had two other imperatives: First, I needed to maintain a high Rate of Reinforcement (ROR) to keep him fully engaged, having as many successful trials per minute as possible. And second, I needed to gradually increase the amount of time he held the bumper before trying to drop it.
  7. Because my timing was reasonably good, it gradually dawned on Lightning that he would not get the reward if he opened his mouth before I said Good (I also could have used a clicker), but he would get the treat if I said Good (or clicked) while he still had a tight grip. Once I saw that dawning comprehension, after eight or ten trials, I began saying Hold the instant he closed his mouth on the bumper.
  8. Then, gradually, he held on a tiny fraction of a second longer after each few trials, though with plenty of backsliding.
  9. When he was clearly, intentionally, holding on for nearly a full second, we did one more trial, the best of the session. I said Good and took the bumper, and I presented the bowl for him to lick the rest of the cream cheese.

So as you can see, in a span of a few hours, we trained the behavior chain as if we were close to completing the indoor phase of this training, and later had to do a beginner’s session just trying to get Lightning to hold the bumper for a full second. For a third session later that day, with a slice of Muenster cheese folded into 16 pieces, we still couldn’t get a good version of the behavior chain, but Lightning had jumped between sessions to being able to hold the bumper in a sit for several seconds. For the final few trials, i tossed his piece of cheese behind him so he jumped up and ran to get it, then came back to me. While he was standing in front of me, I presented the bumper to him and cued Sit. The first time I did that, he dropped the bumper, and of course no treat. The next several times he sat down without dropping the bumper. Yay! Hold is a difficult skill to train.

In fact, it’s worth pointing out that as with many natural retrievers, after months of the dog retrieving  marks, it would be reasonable to think, Oh, my dog already knows how to retrieve. That’s where the word “formal” comes in. Up till now, Lightning’s been doing an informal Fetch approximation. It won’t stand up in competition. It’s the formal training we’re doing now that will prepare him for the rigors and distractions he’ll someday face in the exhilaration and demands of an event.

On a theoretical note, I believe that traditional trainers view this training as forcing the dog to perform the various skills of Force Fetch. I see it differently. What I see happening is that faced repeatedly with a particular scenario, the dog, having experienced the outcome of various choices, learns to choose the behavior that produces the most desirable outcome. In other words, what feels best. From that perspective, Mike and I are doing much the same thing. Mike’s dogs feel best when their chins don’t get cuffed. My dogs feel best when they get a reward. The results are the same but I get to avoid using a physical aversive.

Over the next few days and weeks, using a large number of short sessions, we’ll continue shaping Lightning’s indoor performance until he’s solid on every step of the behavior chain, as well of course as being able to hold like the dog in Mike’s video. 

When we finally have the behavior chain trained indoors, we’ll take it to the yard outside the house and re-train it there, and then again at various training locations.

When we’re done, this behavior chain, eventually minus the extra Sit in the middle, will be our delivery to hand and we’ll use it for all future retrieves. (We’ll need to train Hold for coming out of water eventually, too, but we’ll discuss that later.)

The Hold behavior chain won’t finish our yard work for the Formal Fetch, but it will satisfy our requirements for the first step, Hold, and as it happens, it will also satisfy our requirements for delivery to hand.

How long will training Hold take? That depends on the dog. I think about three weeks for Lightning, but again, Hold is difficult, and it could take longer. Nonetheless, it’s worth every second of the investment to have a solid Hold and delivery to hand.

Simplifying singles with guns out

Today’s session was similar to the one Lightning told you about in yesterday’s post. Again we did both yard work and field work, again Sasha joined Laddie and Lightning for the training, and again one of Sasha’s caregivers joined us, in this case, Sasha’s mommy, Erin.

There were also differences. We used different locations, and Laddie did no yard training and ran only one blind and one mark, though both were 300y+ with significant challenges. Laddie did a nice job, and Sasha made good progress on both the yard and field work we did with her.

Lightning again did well on the formal obedience practice, which was the same as yesterday’s. For the field work, I again ran him on two sets of four retrieves each, using a holding blind, a mat, stickmen, and a gunner (Erin this time) throwing marks. Like yesterday, we used black bumpers exclusively for Lightning. In fact, the first set was virtually identical to the two sets Lightning described in yesterday’s post.

And Lightning’s returns on the first set were once again unsatisfactory, even with him wearing a 15’check cord. I thought he’d show progress from yesterday, but he really didn’t. So for today’s second set, I made some changes to the setup.

First, I took away one of the stickmen, so the new setup had only one stickman. And second, I almost doubled the distances from the start line to where the marks were being thrown, though it meant longer, more tiring walks for me on the poorman marks.

It may seem strange, but I was so confident those changes would solve Lightning’s put returns that I didn’t even put on his check cord for the second set, though he still wore his training tab for steadiness training on the two marks Erin threw.

And I was right. With the longer marks and only one stickman, Lightning came straight back with all four marks, even delivering them to hand. He was also steady on Erin’s last throw, so I never let the tab become taut.

Good progress. I think we’ll be ready for additional challenges, such as adding back the second stickman, and then proceeding down the flow chart, soon.

Formal obedience, singles with guns out, and lead steady

Hi, Lightning here. Since this is “Lightning’s Journal” and I’m Lightning, Daddy said I could write today’s post. To be honest I’m sure it’ll be more interesting than if he wrote it. 

I’ll tell you, it was a big day. First Daddy studied Mr. Lardy’s flow chart a little, and then we watched the section on “Formal Obedience” again on Mr. Lardy’s DVD. I don’t know how many times Daddy’s going to watch it. I’ve already seen it at least three times myself.

From the flow chart, Daddy figured out that if we were going to do both yard work and field work today, the yard work would be “Formal Obedience” and the field work would be two things: “Singles off Multiple Guns” and “Lead Steady (taut lead with use of hand on release)”. But we don’t have a DVD for the field stuff yet, so Daddy needed to come up with his own version.

Daddy did make a more detailed list of our formal obedience objectives. Here are the notes he made, a list of the commands, or cues as Daddy calls them, that Mr. Lardy was saying I needed to learn:

  • “Here” to move out of Sit in heel position, including turns (trainers, including Mike, sometimes say Heel for this rather than Here since Heel is the command used for this behavior in other sports)
  • “Sit” at side when heeling stops
  • “Here” from Sit at front
  • “Sit” in front finish position when called
  • No “stay”
  • “Heel” from front sit to side sit, either side
  • Whistle Sit (one tweet)
  • Whistle come-in (multiple tweets)

Then we arranged for someone to train with, but we would only have one more person besides Daddy, so how were we going to run singles with guns out? Daddy made notes on that, too:

  • Stickmen and/or chairs with white jackets
  • Poorman singles or remote launchers

Daddy packed up our holding blind and a couple of stickmen into the van, but he left extra chairs and launchers in the garage, so I guess that gives you a hint of how the sessions went.

Next we went to pick up the other human, whose name is Sandra. And we also picked up another dog, a fluffy, pretty girl dog named Sasha that Sandra helps takes care of. I guess Sasha isn’t a purebred retriever like Laddie and me, since retrieving doesn’t come as natural to her, but Daddy and Sandra have given Sasha some training. Daddy even has another blog about it, called “Training Sasha”.

So now we were going to do both yard work and field work with three different dogs. Like I said, it was a big day.

For the yard work, we drove to a field up the street from Sasha’s house where Laddie, Sasha, and I have played and trained before. It was quiet at first, so Daddy took Laddie out of the van first and did some formal obedience with him. I don’t know why he bothered. It was way too easy for Laddie. But I guess Daddy was rehearsing what he was going to do with me. He even gave Laddie treats. Believe me, Laddie doesn’t get treats for retriever training very often. After all, he’s a Master Hunter and has a zillion field trial ribbons.

Then it was my turn, and sure enough, Daddy did the same maneuvers with me that he had done with Laddie. Of course it was harder for me, but the treats made it fun even though we weren’t doing any retrieving.

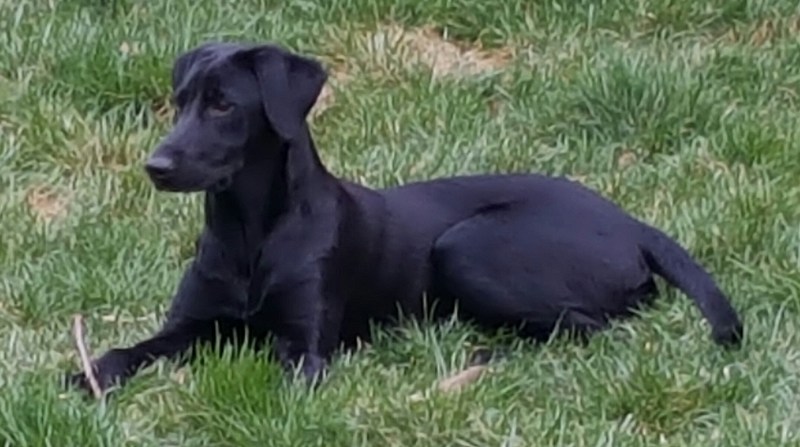
To be honest, our work didn’t really look much like the video. For one thing, I’m a lot smaller than any of the dog’s in the video. I’m just a little guy. Daddy calls me Scrumption when we’re at home.

For another, Daddy didn’t put lines on Laddie or me the way Mr. Lardy did with the dog doing formal obedience in the video. He also didn’t use a choke chain or heeling stick. For my formal obedience training, it was just Daddy, me, and the treats. I guess Mr. Lardy had his way of reinforcing the work his dog was doing, and Daddy had a different way of reinforcing me when I did the same things. It reminded me of some clicker training Daddy did with me before, but he didn’t use a clicker this time. As I completed each task, he’d just say “Good!’ and give me a taste of the sliced ham he had in his pocket.

Remember the list of cues Daddy made from watching Mr. Lardy’s video on formal obedience? Well, we worked on all of them, but in a particular order. Daddy pretended we had a holding blind, and a mat in front of the blind, out there where we were doing our yard work, even though the holding blind and mat were actually still in the van. Then he’d follow these steps:

  1. Sit next to Daddy behind the imaginary blind.
  2. Leave me sitting there while Daddy walked a few feet to the side of the “blind” so that he could see the imaginary mat. He alternated walking out to the left or the right.
  3. Call Here to bring me straight towards him, then cue Sit so that I sat in in front position.
  4. Cue Heel and use a sweeping hand gesture to bring me around to heel position. Again he alternated which side he brought me around on. I’d sit down when I was beside him.
  5. Cue Here and walk straight to the imaginary mat with me walking in heel position beside him.
  6. Cue Sit so that we were both standing on the “mat” facing the same way together.

After we did that once, it turns out we had done all the formal obedience tasks on the list Daddy had made from Mr. Lardy’s video. Daddy had just arranged them into a sequence that we’d need for competition rather than doing the cues in random order the way Mr. Lardy seemed to on the video.

Then Daddy changed where the imaginary holding blind and mat were so that I was sitting behind the new imaginary holding blind, and we did the same thing again, but in a whole new direction, or new orientation as Daddy would say. We did the same six steps over and over, and I got a taste of the delicious ham almost every time I sat down. I felt very good about how our day was going.

Someone brought a dog out of their house where we working so we all got in the van and drove somewhere else to continue our training. Sasha got out first this time, and Daddy worked with Sandra to teach Sasha some obedience skills, too.

That completed our yard work. Now it was time to begin our field work. Daddy and Sandra put on their white jackets and whistles, got out a couple of radios, and loaded up a blank pistol.

As usual, Laddie got to go first. Sasha and I couldn’t see what was happening, but Laddie told us later that he ran a big double with a retired memory bird, and then an even bigger blind. I hope you know what all that stuff means, because I don’t.  I just heard the gunshots and whistles from my crate.

Laddie didn’t get another turn, but Sasha and I each got two more turns. First Sasha, then me, then Sasha, then me again. Sasha ran singles and was mostly practicing her returns, wearing a long line Daddy had brought to help her learn.

My sets were more complicated. For the first set, Daddy got Sandra to help him bring out the holding blind, the mat, and both stickmen, which were metal T-shapes dressed in white one-piece uniforms. Daddy set up the blind and put the mat a few feet in front of it. Then he planted the stickmen about 20y in front of the mat, but on angles to each side. I think he would have put them further out but he was going to walk to them while we were training and he doesn’t walk very well these days. He asked Sandra to go out with two black bumpers and the pistol. She went out about twice as far as the stickmen, and stayed in the angle between them the whole time. Once she was more to the right and threw toward the left, and the other time she was more to left and threw toward the right. This was one of the mirror setups Daddy likes to use to keep me balanced.

Here were the steps of our field practice:

  1. From behind the holding blind, Daddy brought me to the mat using the same steps we had practiced the other day and again during yard work today. Of course this time the blind and mat weren’t imaginary.
  2. Daddy threw a poorman single from one of the stickmen. That is, he left me sitting  at the start line, walked to the stickman and threw a black bumper, walked back to me, and sent me on my name.
  3. We went behind the blind again, then came back out again, and this time I ran one of Sandra’s singles. I was wearing my training tab, which Daddy held loosely rather than taut as the flow chart said. Daddy doesn’t want me to be aware of the tab unless I break. Sometimes I did try to break but I couldn’t because of the tab. Other times I didn’t even bother to try to break and just waited till Daddy sent me so I couldn’t even feel the tab.
  4. We repeated steps 1 and 2 for the other stickman.
  5. We repeated step 3 with Sandra throwing a single from the other side and in the opposite direction.

So that’s how Daddy ran me on “singles with guns out”. I had no trouble marking the falls and running out to pick up the bumper each time, but to be honest all those white coats out there had me confused and I have to admit my returns were awful. When Daddy brought me out for the second set of four marks, he moved all the equipment to new positions and orientation, and this time he had me wear my check cord, which I haven’t needed the last several training sessions. But the check cord helped Daddy catch me before my returns got too bad, so I had a chance to do better on the second set. I even delivered my bumpers to Daddy’s hand a few times instead of dropping them at the start line, even though Daddy doesn’t require me to delivery to hand the way he does with Laddie.

So that’s how the day went, with both yard work and field work for all three dogs. Daddy looked exhausted, but everyone else was fine and we had a great time. I’m ready for more soon, tomorrow I hope!

Onward to Stage 2

As I’ve mentioned before, I’m developing a program I call Positive Retriever Training (PRT) and modeling it on the Total Retriever Training (TRT) program developed by renowned field trainer Mike Lardy. I’m using PRT to train Lightning for a career in field trial competition.

As you’ve seen in my previous posts, I’ve modeled PRT Stage 1 on the section called Socialization and Introduction to Field in Mike’s TRT Flow Chart but not discussed in detail in his video. I also included in PRT some topics not covered in Mike’s program, such as playing catch with a tennis ball and nail trimming.

My original intent was to go onto Stage 2 with Lightning when we had carried out all the Stage 1 training and also when Lightning had finished teething. I was expecting to start Stage 2 about the time Lightning turned six months old, which was three weeks ago. But I felt at that time that Lightning had missed too many weeks during Stage 1 because of my back injury and then because of the winter weather, so I decided to continue work on Stage 1 objectives until I felt Lightning had a well developed understanding of, and motivation for, the retrieve pattern, that is: go out, pick up the bird, and bring it back. Over the last several days of practice, continuing the kind of work I’ve described in previous posts, I’ve come to feel that we’re now ready to begin PRT Stage 2.

PRT Stage 2 is modeled on TRT Basics. During the next several months of Lightning’s training, I’ll describe all the work in this positive approach to the training. But as the indispensable basis for the PRT program, we’ll begin by familiarizing ourselves with Mike’s TRT material.

First, look at the Basics section of the TRT Flow Chart (available online). The left column is called “Yard Sequence”, the right column, “Field Sequence”. This layout is significant both horizontally and vertically: horizontally because the yard work and field work are to be done in parallel, so that the dog progresses down both columns simultaneously; and vertically because the steps Mike describes in each column are to be worked on in the order he lists them. That allows the later concepts to build on the earlier ones. PRT users the same approach and works toward the same objectives in the same sequence, but with some modifications, especially the elimination of force as both an objective and a method.

After you’ve looked at the model for PRT Stage 2 as shown in the Basics section of Mike’s TRT Flow Chart, next watch the first disc of Mike’s TRT video. That will be the basis for our next phase of training.

It is impossible to overstate Mike’s success and contributions to the sport nor my respect for his work. Virtually every second of his program is filled with brilliant insights as applicable to PRT as to Mike’s own TRT program. But since PRT involves training without physical aversives, I’d like to provide some notes to the material in TRT first disc, from the perspective of the PRT approach, addressing those areas where the two approaches differ:

  • The first statement I would disagree with is that pressure is necessary. That’s because I look at a dog’s performance from a behavioral point of view. The dog will behave in a particular situation according to a wide variety of factors, including instinct, health issues, and classical and operant conditioning. All of those factors add up to a single rule that controls all behavior: the subject will do what feels best. Using pressure to build the dog’s reinforcement history for particular behaviors, thus making the desired choice feel best, is certainly effective, but to me pressure itself is not the fundamental concept. Rather, any approach that develops the same reinforcement history for the same behaviors would, by definition, be just as effective. That statement in itself doesn’t guarantee that other approaches are possible, but the success of my two Goldens, and the hoped for success of Lightning, have shown and will continue to show that pressure, in the form of physical aversives, is not required to train a competition retriever.
  • I will also just say that I disagree that it’s possible for a human to recognize “lack of effort” or “not trying” in a dog’s behavior. To me that’s mind-reading and is simply not possible. My belief that you cannot distinguish lack of effort from making mistakes is as axiomatic to me, as the belief that you can tell the difference is to Mike and his many followers. It might be an interesting debate, but other than stating my position, I won’t go into it further here. Needless to say, PRT doesn’t depend on the trainer being able to make such a judgment. In terms of Mike’s approach, another way to look at it is that a PRT trainer is always in the education phase, and never switches to the punishment phase.
  • Mike begins the section on formal obedience by saying that he’ll be using a heeling stick and choke chain. Though we’ll be training the same cues — Heel, Sit, and Here — in PRT, we won’t be using those tools. For example, where Mike pulls on the chain to train Here leaving heel position, we use the same verbal cue but add a hand gesture as a visual cue if necessary. Of course, like Mike, we reinforce correct responses with encouraging words and tone. Depending on the dog, we can also use treats if that improves performance. We don’t use treats to lure, however, since that becomes part of the cueing and the dog won’t understand what to do when the lure isn’t used. Instead, use treats as rewards after the correct response. While treats help train pretty much any Stage 1 dog, for many dogs they add little if any benefit to training a dog in Stage 2 and beyond. Use experimentation to determine what works best for each of your dogs. As for having the dog sit when you stop, we described that training during Stage 1. The dog does not need to be on a line or have any aversive physical contact to develop the level of heeling skill needed by a competition retriever. In fact, even more refined versions of heeling are routinely taught to dogs in other sports without the use of physical aversives.
  • That said, I think the method Mike demonstrates for practicing Here and Sit during heeling is fine within the PRT program provided you don’t jerk the line, as Mike says to do within TRT, but instead gently guide the dog with the line. Since Mike’s “jerks” appear quite gentle anyway, there’s little difference. However, I might mention that Mike says one thing but seems to demonstrate something a bit different: he says to use the correction only if the dog doesn’t respond correctly, but he often pulls on the rope while giving the verbal cue rather than waiting a moment to see whether the dog will respond correctly to the verbal cue. Mike is one of the great training masters, but as he himself often expresses, the dog needs to learn how to avoid the correction. The dog in the video is unable to avoid several of Mike’s jerks on the rope no matter how willing he is to respond to the verbal cue, because the jerk happens simultaneously with the cue.
  • I guess it goes without saying that PRT doesn’t use the Force Fetch method. We call the corresponding step in PRT “Formal Fetch”. The objectives are nearly the same, except that we don’t consider training the dog the meta-skill of dealing with force as a necessary or desirable objective.
  • In my post “Training Take it and Out” from a few weeks ago, I described a different approach to training Lightning to take an article in his mouth during Stage 1 than Mike demonstrates in the video in the Force Fetch section. I think training the dog a “Take it” or “Fetch” cue using positive reinforcement is preferable to physically forcing the article into the dog’s mouth. Mike, however, demonstrates a fairly gentle approach to doing so.
  • Of course a PRT trainer would not cuff the dog under the chin during Hold training. In fact, you’d want to maintain a higher Rate of Reinforcement than Mike demonstrates, rather than repeatedly cueing Here without taking the bumper until the dog drops it and needs, in Mike’s approach, a correction. By staying in the education phase, the correction is never needed. Instead, after an incorrect response, you adjust your interaction so that the dog can again be successful and incrementally reach whatever level of skill is required.
  • I’d like to emphasize that, aside from the previous notes, I really liked Mike’s section on training and proofing Hold. By the way, you can strengthen the Hold even more by actually petting the dog’s head and chest during the hold, and then taking the bumper.
  • I have a confession to make: I’ve never watched Mike’s section on ear pinching before, because I’ve seen people use a much harsher version of it. His version is gentler than I’ve seen before, but in PRT you don’t use any ear pinch at all. The description I gave for the cue “Take it” in my earlier post accomplishes the same thing, except that you’d now use the cue “Fetch”. Aside from the ear pinch, my feeling is that Mike’s guidance on incrementally developing the Fetch cue is great. I’d have broken the Fetch session into even shorter sessions, however.
  • On a theoretical note, the video mentions the power of avoidance conditioning. I’m fully in agreement with that, and I think behavioral research backs it up. But I’m not willing to use physical aversives to produce avoidance conditioning, not because it doesn’t work — it does — but because I don’t want to train that way and I don’t believe it’s necessary. You saw the young dog whining several times in the video. None of my dogs have ever done that and I don’t ever want them to. That’s a visceral reason for my developing the PRT program.
  • Naturally, we’ll train Walking Fetch without the ear pinch, and we won’t use Stick Fetch at all, though we will add proofing to the Walking Fetch instead. Perhaps there are retrievers who do not develop a compulsion to fetch without the use of aversives. But my feeling is that many, at least, have that compulsion bred into them and don’t need to be tapped with a stick to acquire it.
  • Mike shows beautifully how casting, the beginning of handling, organically grows out of the dog’s Fetch training. The only change we’ll make for the PRT program is that we’ll simply draw the dog away from the pile if he/she attempts to shop, rather than adding an ear pinch. Losing the opportunity to complete the retrieve is hugely significant to the dog and, like the ear pinch, will also teach the dog not to shop. I might mention that while shopping is an annoyance during training, it doesn’t actually come up in competition. A note on terminology: as Mike demonstrates, the bumpers in a “pile” are not stacked and do not touch one another.
  • The last section of disc 1 provides an overview lesson on ecollar conditioning and refers you to a separate course on the full topic. We of course won’t use an ecollar. But we will use the same several sessions, at the same point in our PRT program, with the goal of achieving every bit the same quality of responses as the dogs in the video demonstrate. I would also add that anyone who is convinced an ecollar must be “cruel” can see that is simply not true by watching the video. I don’t want to use a collar, and you may not want to either, but to me, retrievers being trained under the humane methods that Mike teaches are in no sense being abused.
  • I see now that we’ll also need Mike’s Total Retriever Marking course to fill out the field column of PRT Stage 2. I’ll order that and we’ll review it in a separate post.

Now that we’ve reviewed TRT disc 1, we’re ready to begin PRT Stage 2 training for Lightning. We’ll get to the subsequent TRT discs later.


Heeling to the start line

Today, on our first day of Stage 2 training, I began teaching Lightning the formal pattern for heeling to the start line. Here’s how we went about it.

For equipment, you need:

  • High-value treats (I use sliced deli meat)
  • A holding blind
  • A rubber mat
  • Possibly a mallet to drive the holding blind’s posts into the ground
  • Your dog will wear both his/her training tab and a lead for walking. I use a British slip lead because it easily fits in my pocket while I’m running the dog
  • One bumper
  • You don’t need an assistant, but when you have one, he/she can play a judge

Now, using the treats for ample reinforcement, train the pattern you will use for heeling the dog to the start line. Trainers use a number of variations, but here’s the pattern I use, and I believe many others do as well:

  1. Start with an empty dog by airing your dog as long as necessary. Don’t waste a training or competition opportunity by trying to run a dog distracted by nature’s call, resulting in a subpar performance.
  2. Begin the sequence by walking the dog on lead to the center of the holding blind.
  3. The dog may spend several minutes in the blind, so use soothing words, petting, and so forth to make the wait comfortable. If it helps during training, you can also use treats for this process.
  4. In competition or a training day, use this waiting opportunity to watch the team in front of you and learn what you can from their work.
  5. At the same time, watch closely for any loose dogs that approach the holding blind. Protect your dog, and above all prevent a dog fight. If necessary, drop to your knees and wrap your arms around your dog. If the other dog gets too close, warn that dog in no uncertain terms, “GET OUT OF HERE!” If that embarrasses the dog’s owner, fine. More likely, he/she will be grateful for your diligence in preventing a fight that could lead to both dogs being eliminated from the event or even banned from the sport.
  6. When the judge invites you to run your dog, ask any questions you might still have.
  7. Now it’s time to bring out your dog. Cue “Sit”. Most people use a verbal cue, but some use a whistle.
  8. Remove the dog’s lead. In training, the dog is still wearing his/her tab until reliably steady.
  9. Leaving the dog in a sit, step outside the holding blind. Practice both sides. If you have a choice, choose the side that will give the dog the best view of the setup as he/she approaches the start line.
  10. While watching your dog waiting in the holding blind, stop a few feet away, turn your body toward the start line, and call your dog to heel. Again, practice both sides. Having the dog sit at heel is optional, but at this moment, you and the dog are now under judgment, so train this maneuver to be performed with some precision. I gave Lightning a piece of ham here. Practice until you can call the dog to heel from the holding blind and to your side with the two of you fully engaged with one another.
  11. Heel the dog to the start line, that is, the rubber mat a few feet in front of the holding blind. Sometimes it is quite close to the holding blind, but usually it’s several feet away. Again, you are under judgment and the dog needs to learn this maneuver with precision. I used ham for this step, too. Practice initially away from all distractions, then, over time, proof with the greatest distractions you can arrange. Reinforce correct behavior amply, but if the dog breaks away when training this maneuver, gently put on the dog’s lead, return to the holding blind, and start again. Practice heeling the dog to attain fluency on either side.
  12. Heel the dog onto the mat and cue Sit. Typically the dog only needs to have one foot on the mat, but if you’re not sure, that’s one of the questions you would have asked the judge. In training, reinforce a correct response, but start over if the dog doesn’t sit down immediately.
  13. In theory, you’ve now finished practicing the skill we’re working on right now, but the dog would probably appreciate it if you’d throw the bumper for him/her to retrieve. Hold the dog’s tab if necessary to prevent a break, then send the dog on his/her name. Cue the dog to heel, again practicing both sides, and take the bumper. We’re beginning this training before we’ve taught a delivery to hand, so it’s OK if the dog drops the bumper rather than holding it for you take at this stage. On the other hand, if the dog doesn’t let go of the bumper either when you take it or when you cue Out (or whatever cue you use), just wait until the dog becomes bored and releases the bumper.
  14. You are still under judgment, so don’t take your lead out of your pocket yet.
  15. Don’t turn away from the dog. The dog will sometimes break at that moment. Instead, position yourself to block a break and cue Heel.
  16. After heeling a few feet, and before walking past the holding blind where the next dog is waiting, stop and put on your dog’s lead. Many trainers trust their dogs and therefore don’t follow this step. When he was younger, Laddie was attacked twice in the holding blind by such dogs. It did not improve his attitude toward other dogs.
  17. In competition or with a training group, you’d now typically walk the dog on lead to your vehicle. When training this skill without other dogs in line, you can return to the holding blind and repeat the sequence to continue practicing it.

Based on Lightning’s training in Stage 1, he was able to perform this sequence on both sides in a non-distracting setting the first time we tried it. Other dogs may need more or less detailed training before being able to perform all the steps in sequence, but all dogs will need extensive distraction proofing.

When you and the dog are ready, merge this sequence into all your retrieve practice so that the novelty and difficulty is gone by the time the dog is running in an event. That way, you can both focus on the test instead of the mechanics of getting to the start line.

Update: I was a bit too impatient to begin Lightning’s Stage 2 training when I started today with heeling to the start line. I believe the material I covered here is still worthwhile, and Lightning did fine with it, but I now feel that my sequence was less than ideal. PRT Stage 2 should begin with the training Mike demonstrates in TRT disc 1, as introduced in the next post, and that’s how I’ll proceed with Lightning from here on.